CNC Controller Upgrades
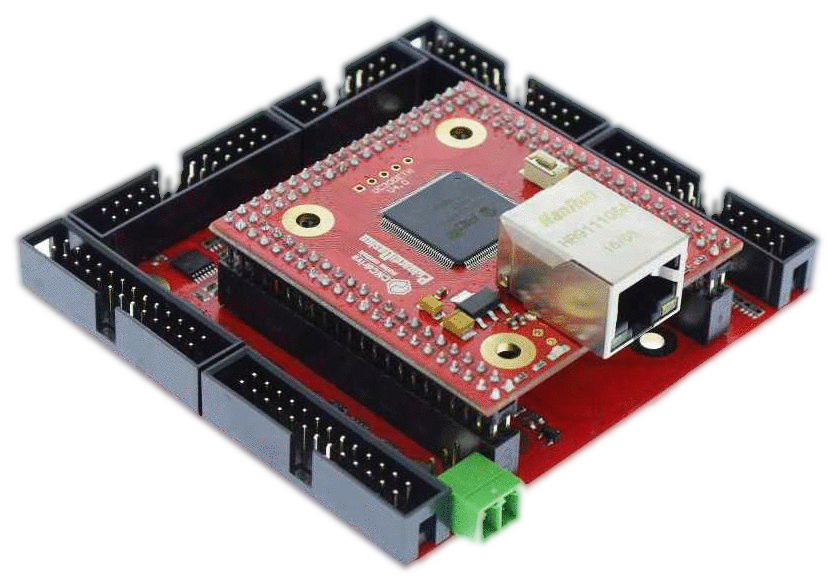
First, for a bit of background: In late 2022, I got tired of small annoying glitches that were often occurring in Mach 3 when I was using my CNC Lathe, and so I decided to finally pull the trigger on a new CNCdrive UC300ETH-5LPT ethernet motion controller.
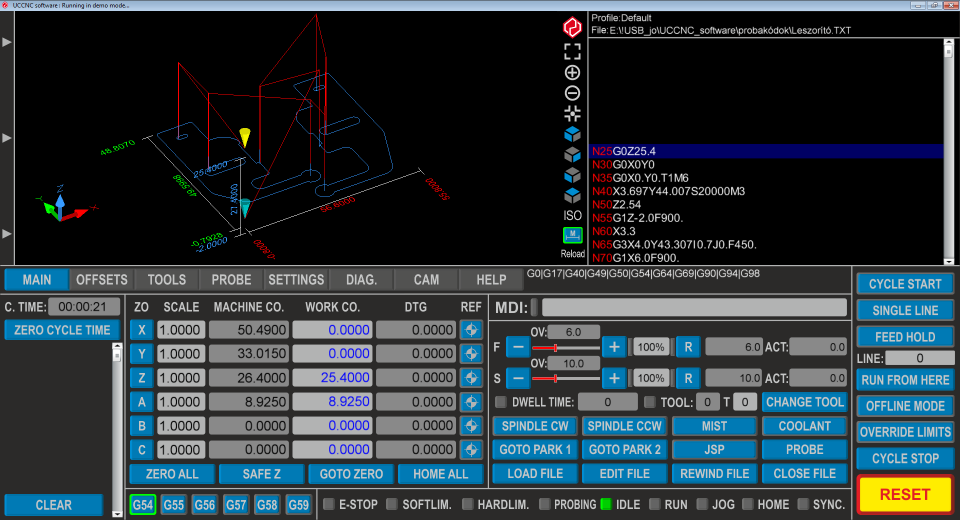
I also decided to give their UCCNC software a try, but I had spent a lot of time developing a custom screen set for Mach 3 that I had gotten used to and was comfortable using, so I was Certain I would NOT be using the screensets that came with UCCNC (I just can't get over how cluttered and cartoony everything looks!).
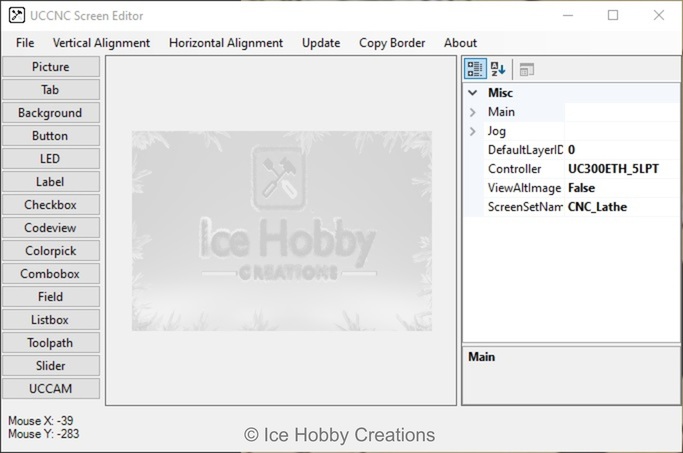
When I started editing the screen, however, I found the approach very cumbersome. So, I searched online a little bit for tools to make it easier to edit and stumbled across UCCNCEditor on SnapWebApps.com. And while it was certainly nicer to use than the built in editor, I felt it still had some shortcomings. For one, you could duplicate GUI items, but only into the same layer that the originals were on. Additionally, I wanted to be able to store button image information to programatically make buttons and background images, so that I could keep everything looking consistent. So, just before Christmas, I started working on an image editing tool in C# to at least make button images based on just a couple of input parameters such as boundary width, color, highlight color, LED color (for LED type buttons), etc. After painfully stumbling through and making a Lathe screenset for UCCNC, I decided that I would like all of my CNC machines (current and future) to have consistent controller interfaces, but making tweaks was still very painful.
As is my habit, I let project creep set in and decided that instead of just having a tool to make consistent images for the screensets, it would be nice to be able to move screen elements around, create new elements, copy them across tab pages, and more, as this would make it a lot easier to generate 3-6 axis mill/router screensets to complement the Lathe controller. It would also be nice to be able to store all of this "additional" generation information in a single file so that if I decided to make tweaks to button styles, etc. I wouldn't be stuck fiddling around in a paint program and could just update my "style" parameters and regenerate all of the images at the same time.
The next couple of weeks represented a lot of learning, frustration, and happiness as the project was coming together.
Just parsing the native .ssf files proved very tedious, and I'm sure there's a lot of unknown bugs in that particular bit of code, but once I could get a base file loaded, I decided to quickly translate it into an XML format so that I could be a bit more tolerant of the specific "grammar" when saving/reading.
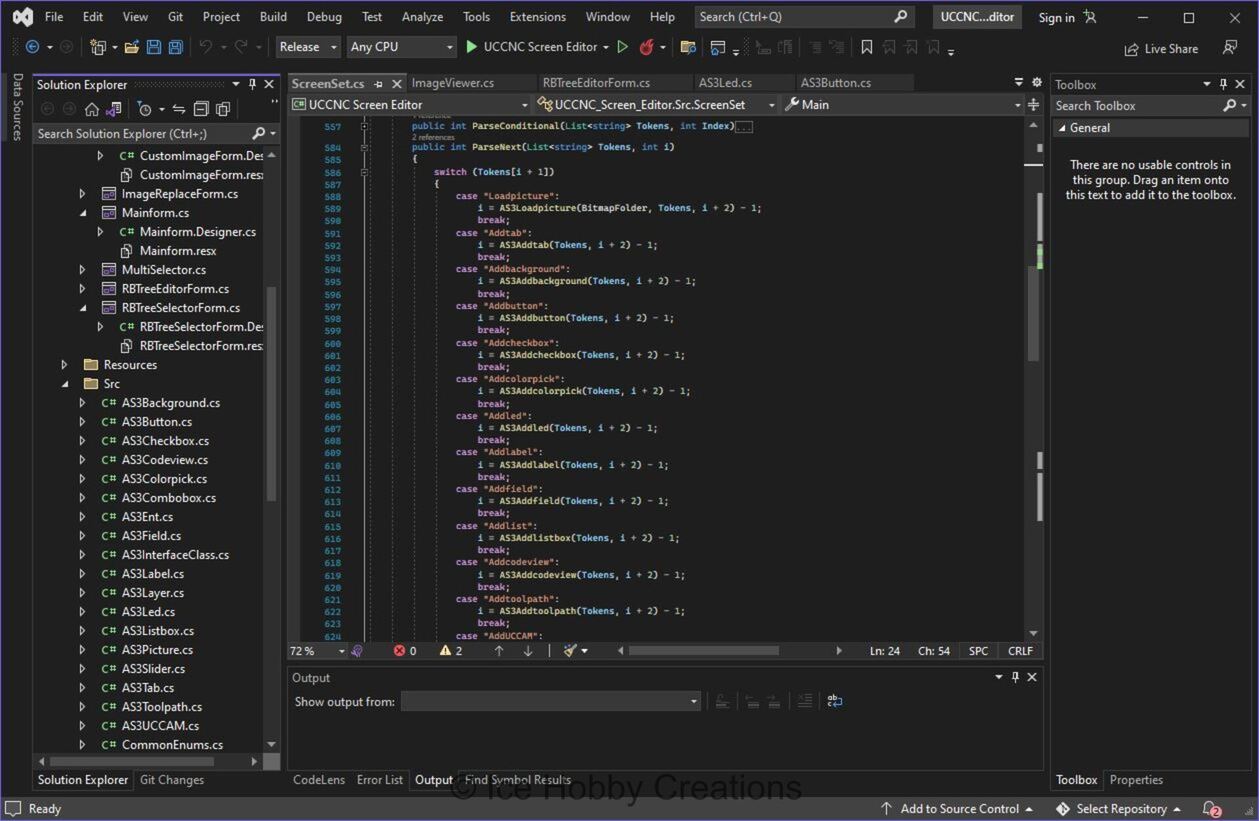
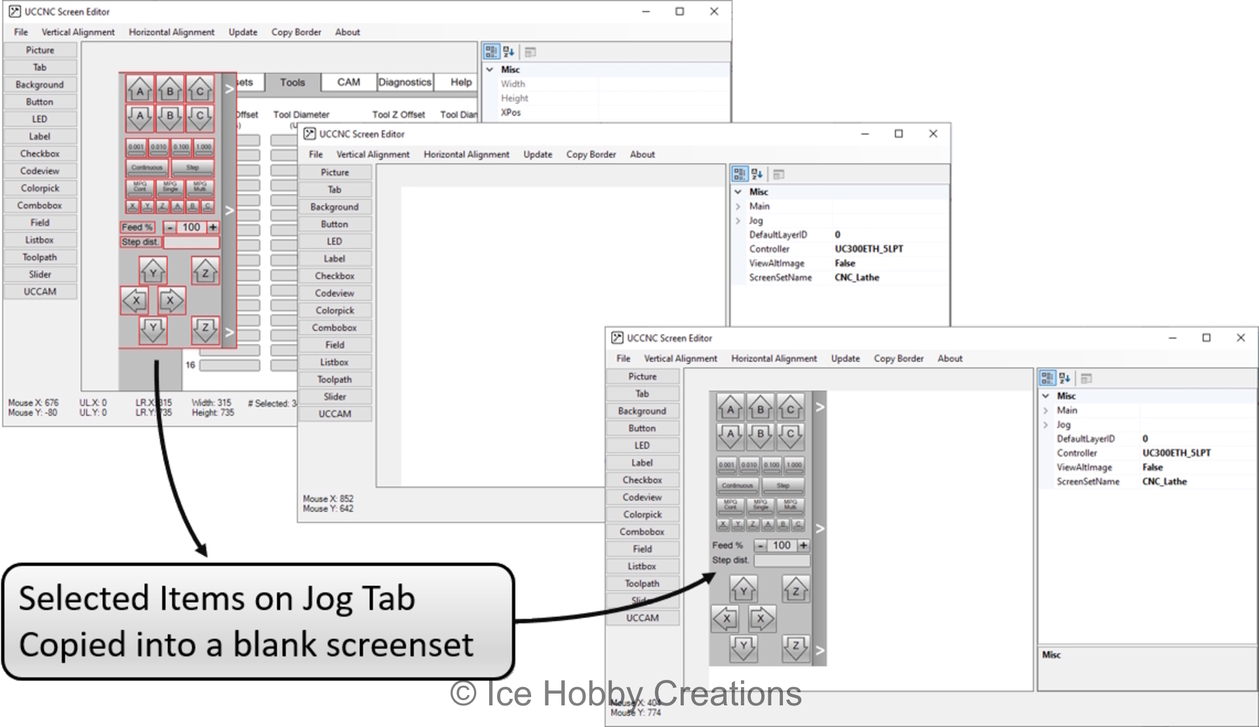
With XML reading/writing, it turned into a fairly trivial task of copying/pasting entities. Effectively, I just needed to create a list of selected objects, write out an XML container tag, the call each GUI entitie's WriteXML function, and copy the resulting code to the clipboard. Then, to paste, it was just a matter of checking the clipboard's text for the appropriate container tag and then calling the selected layer's ReadXML function. A little bit of ID management later, and I could easily copy entities from one layer to another or even from one screenset to another.
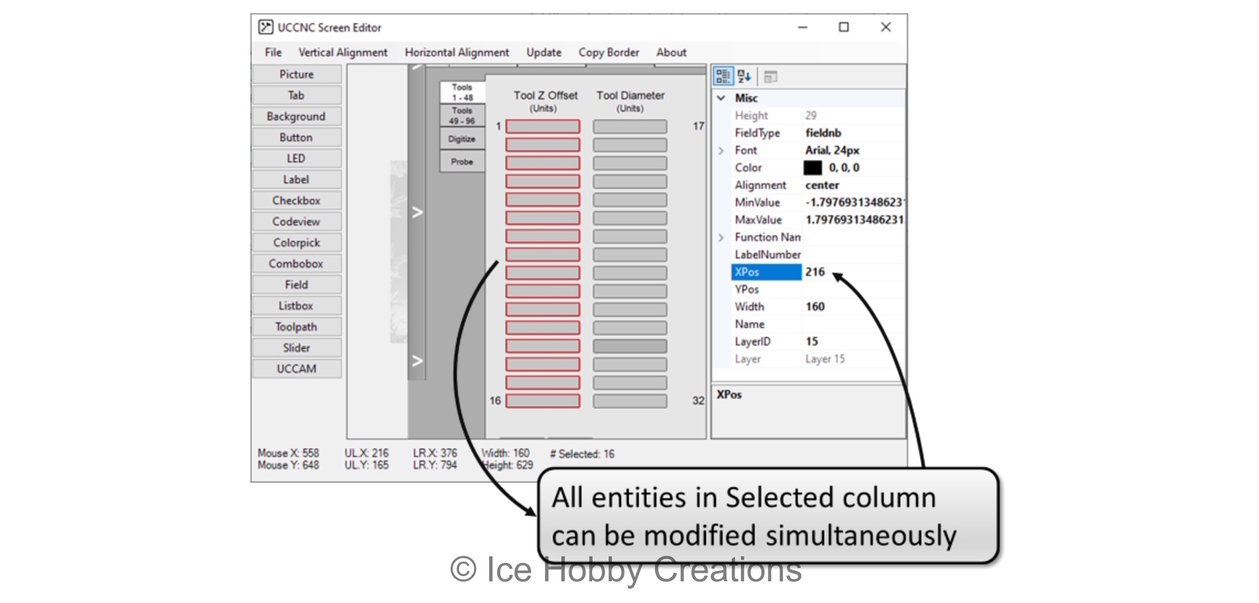
In addition to being able to easily copy GUI entities, the property grid view lets me easily modify any common property within the selected group. So, for instance, if I wanted to move an entire column of fields, maybe, for instance, on a Tool Table setup page with 48 entries...
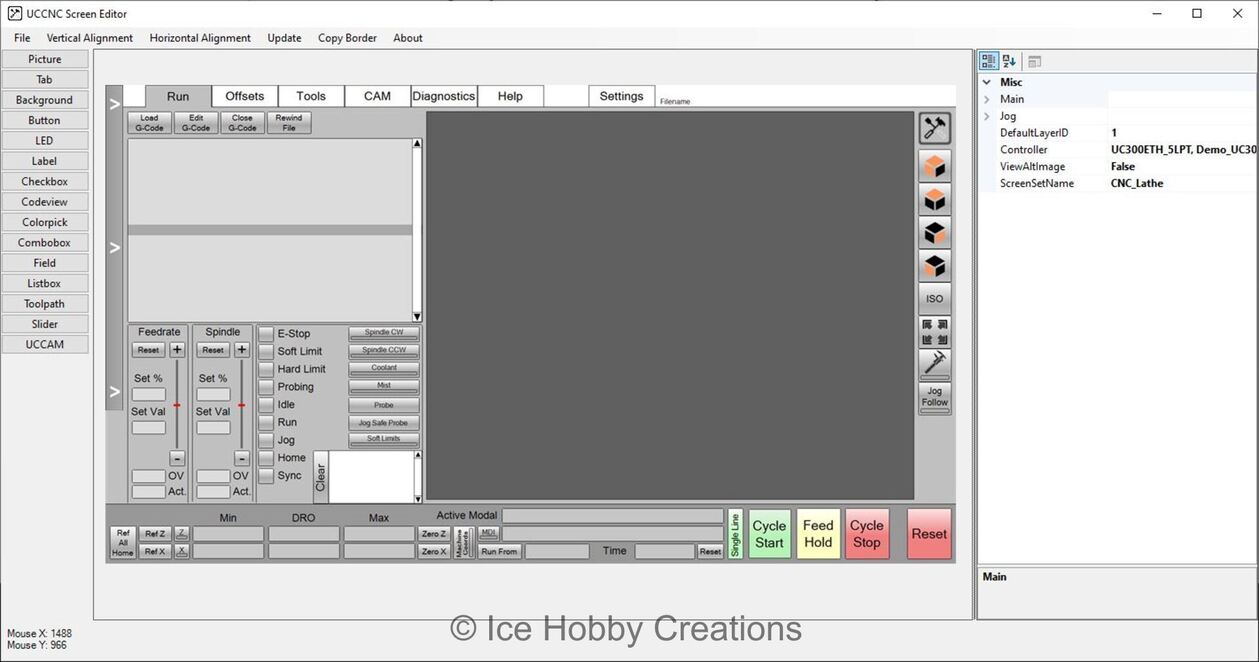
I also, decided that I didn't want to have to worry about folder references, so I take all of the images, whether generated in the tool, or selected via a normal file selection, and store them in the XML file as a "binary" string. That way, the XML is completely self contained and there's no worry about losing files when working with the data or trying to clean up the folder structure. When saving a .ssf, the images are then written out relative to the save location based on the screenset name. Additionally, there is fairly comprehensive undo/redo capability, though presently the user has to press buttons instead of using the more typical "ctrl+z" and "ctrl+y" keyboard shortcuts. Here's a shot of the lathe screenset that I developed and modified with this tool:
I still have a lot that I want to add to this tool, but at this point (around 12,000 lines of Dense code), the software is fairly mature and seems to produce good screenset files, so I think it's about time to share it! There are still some known bugs, but it is mostly just behavioral, still best to keep a backup file around, though! Also, I intend to update this area with a guide on how to effectively use the tool in the future, but for now, if anyone is interested and wants to fiddle around with it, it can be found Here